Solution vs Suite: Adobe’s new Digital Publishing platform explained.

tabletdesigner's avatarDigital Matters.

Digital Publishing Suite

In early 2010, software giants Adobe worked with Wired magazine in New York and San Francisco and developed a brand new and highly innovative digital publishing system, Adobe Digital Publishing Suite, for publishers to create and publish interactive versions of their magazines for the newly-launched iPad.

Adobe’s aim was to create a system where magazine teams could work with an updated version of InDesign – the leading layout design software – and manipulate their existing magazine layouts, to publish an interactive touchscreen version of the print magazine, all without requiring to know a line of code.

The two teams collaborated over several months to create a workflow concept, and a number of ‘plug-ins’ for InDesign, and these appeared as an update to the design tool, in the form of interactive panels. The designer could manipulate elements on the layout (eg: text boxes, colour panels, image frames, icons)…

View original post 805 more words

Domains: Seven Things You Need to Know

Transforming Objects with Puppet Warp [UP21]

Source: Transforming Objects with Puppet Warp [UP21]

Your Statistics: More Than Just an Ego Boost

Community Pool

Want some blogging advice? Looking for constructive non-spam help from the Word Press community? Check out the Community Pool

Digital storytelling: when art and science connect emotions

Digital storytelling: the drivers, success factors and where the true magic happens.

Source: Digital storytelling: when art and science connect emotions

Using the WordPress Interface

Welcome to WordPress. No doubt you are staring at this interface a lot already.

We went over a lot of things in class, but I want to make sure that you’re totally comfortable with it, so here is a helpful handout created by our JMC305 professors.

WordPress Interface handout

What a difference a header makes!

Installing Lightroom Presets

Adobe Lightroom is a very powerful tool, especially when combined with high quality presets.

Downloading and installing Lightroom presets is easy – this quick and handy guide will show you how.

Step 1: Purchase and/or Download Lightroom Presets

The very first step is to download some Lightroom presets. Good news for you, we offer a free sample pack of 20 presets to our newsletter subscribers. Simply enter your email on this page and you’ll receive your sample presets within minutes. Then, simply download the pack to a location on your computer that is easily accessible (like on your desktop).

Most Lightroom preset packs come bundled in a ZIP file. Simply unzip the file and you will then have a folder that contains all the Lightroom presets.

Step 2: Locate the “Develop” Folder

Now that you have a folder with the presets on your computer, open up Lightroom. Then, find the preferences menu item and open up the Preferences panel.

How to install Lightroom Presets
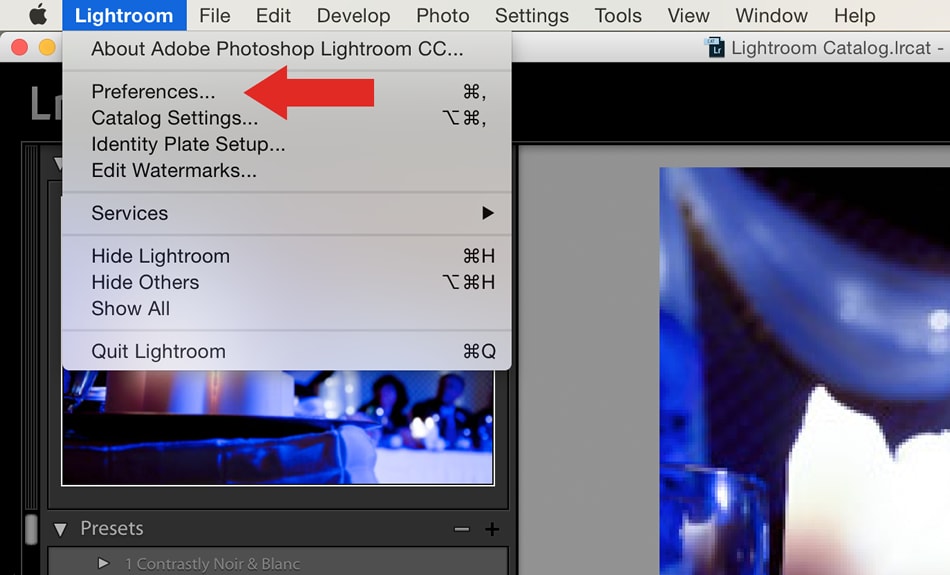
At the top of this window, you should see a few tabs. Click the “Presets tab“.

Lightroom Presets Tab
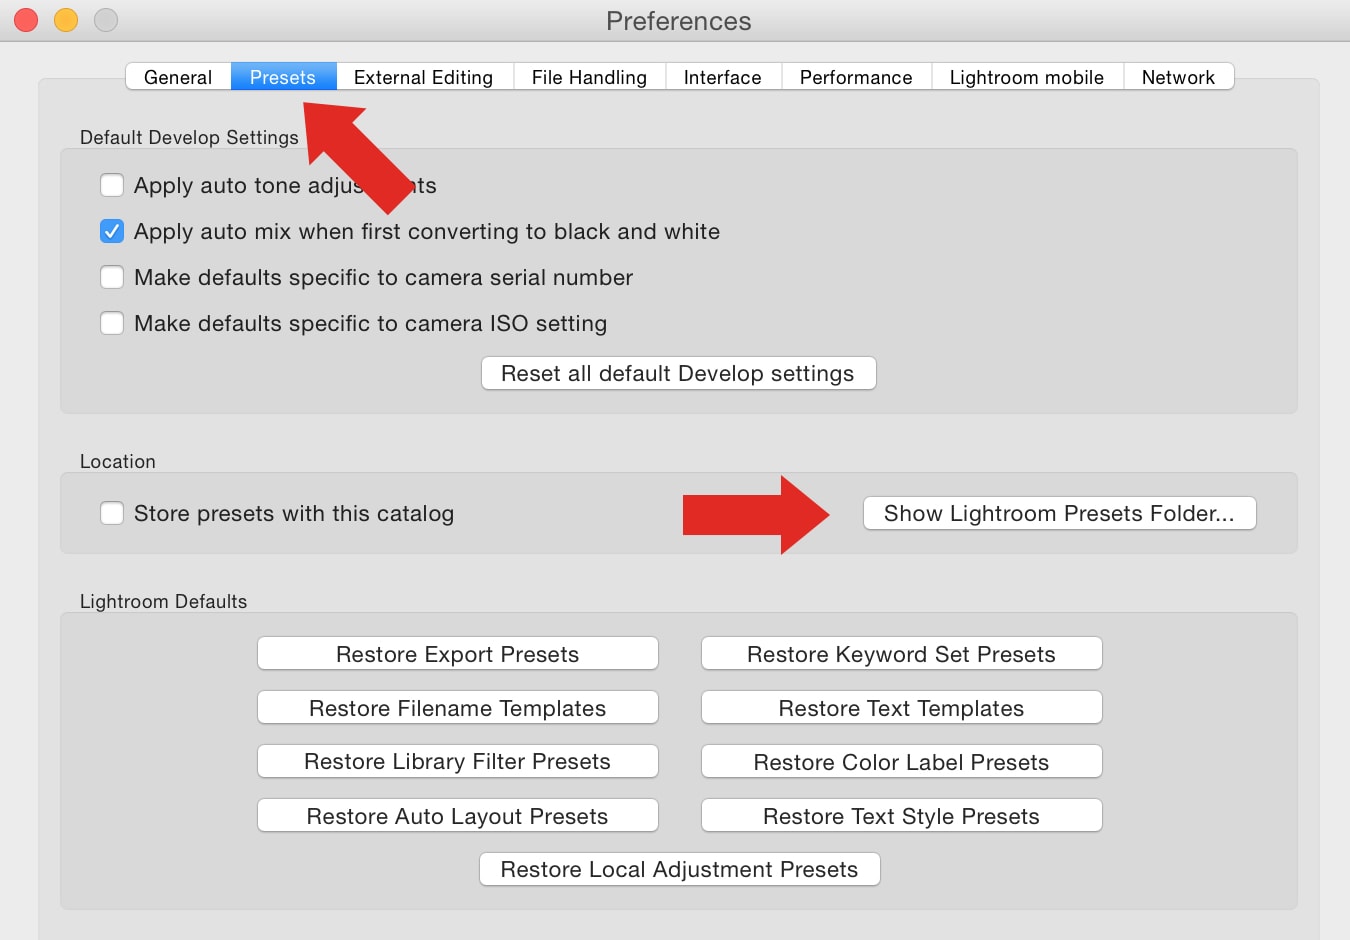
Then, click on “Show Lightroom Presets Folder“. This will open up your Lightroom Presets folder, inside it you will find a folder named “Develop Presets“. This is where you will install your Lightroom Presets, like the ones you purchased or downloaded from the Contrastly Store.

Lightroom Develop Folder
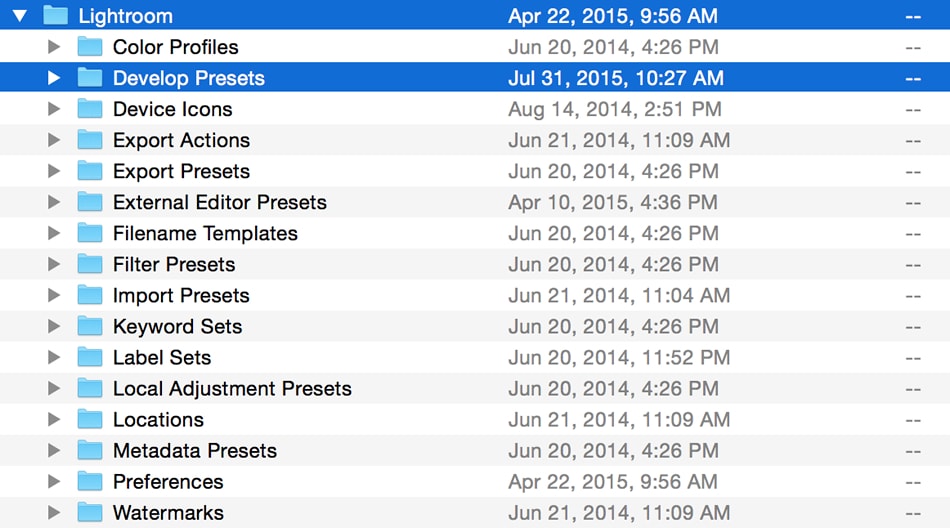
Open this folder. Inside of it you will find a few existing presets as well as any other presets you have installed already.

Now, simply move the presets you have downloaded (the ones from Step 1, they should be on your desktop or in your Downloads folder) into the Develop Presets folder.

Then simply quit Lightroom and re-open it. You will then see all your new Lightroom presets under the Develop module, in the Presets panel on the left.

Lightroom Develop ModuleEnjoy!

Continue reading

24 Sound Basics That Will Help You Lay a Sturdy Foundation

24 Sound Basics That Will Help You Lay a Sturdy Foundation.