Adobe Lightroom is a very powerful tool, especially when combined with high quality presets.
Downloading and installing Lightroom presets is easy – this quick and handy guide will show you how.
Step 1: Purchase and/or Download Lightroom Presets
The very first step is to download some Lightroom presets. Good news for you, we offer a free sample pack of 20 presets to our newsletter subscribers. Simply enter your email on this page and you’ll receive your sample presets within minutes. Then, simply download the pack to a location on your computer that is easily accessible (like on your desktop).
Most Lightroom preset packs come bundled in a ZIP file. Simply unzip the file and you will then have a folder that contains all the Lightroom presets.
Step 2: Locate the “Develop” Folder
Now that you have a folder with the presets on your computer, open up Lightroom. Then, find the preferences menu item and open up the Preferences panel.
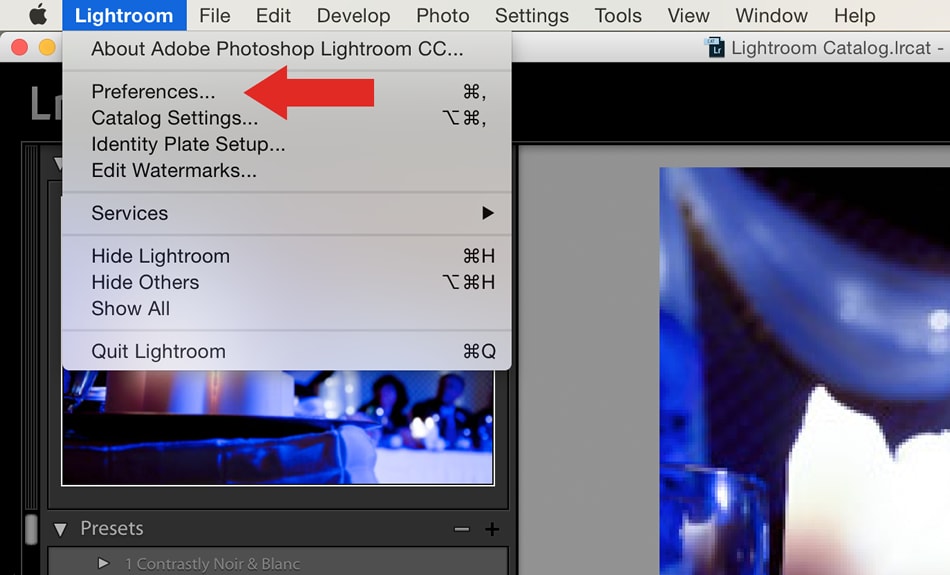 At the top of this window, you should see a few tabs. Click the “Presets tab“.
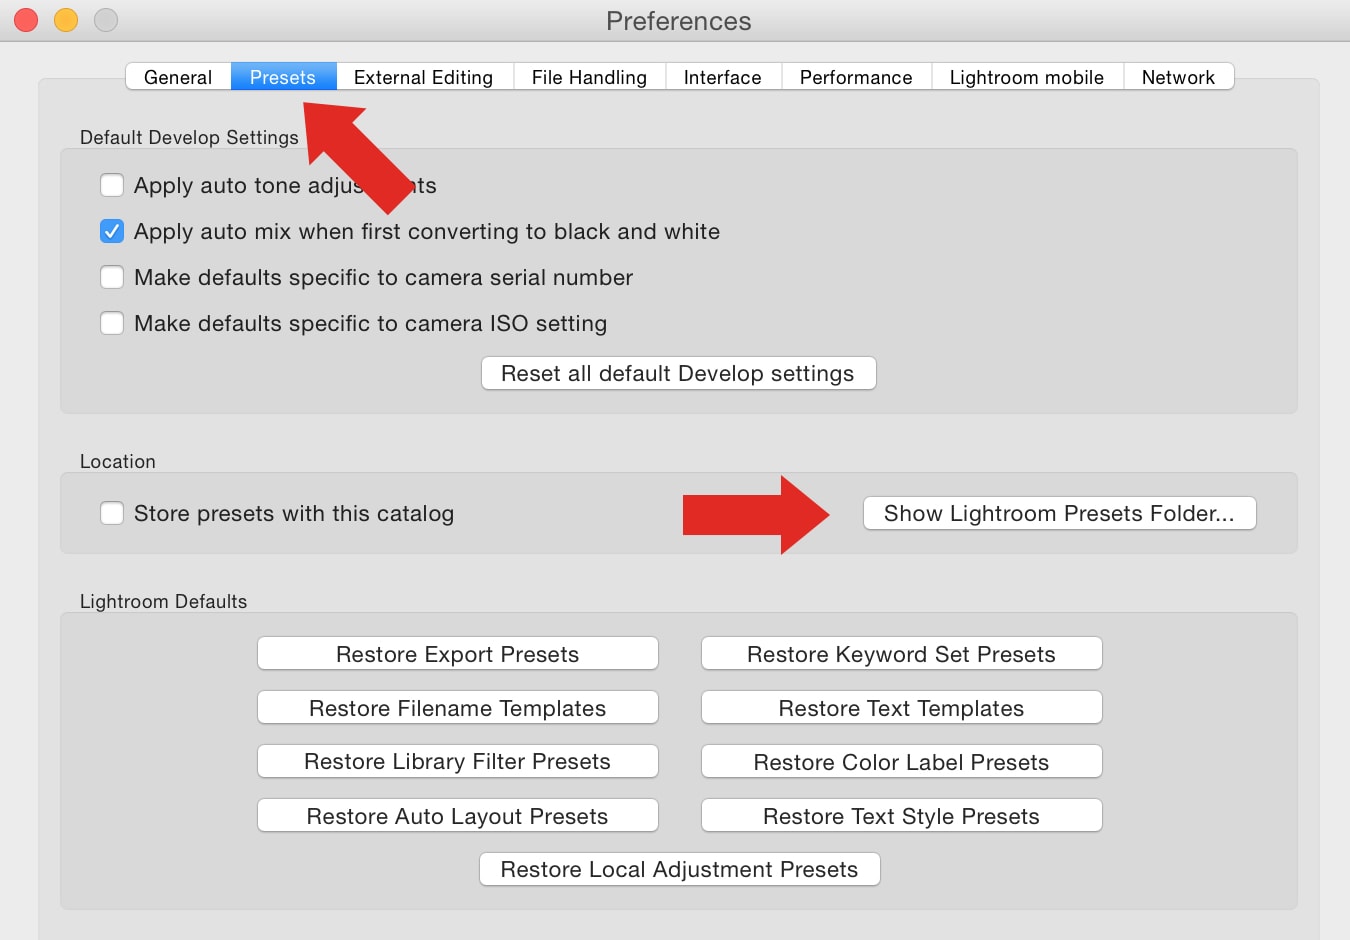 Then, click on “Show Lightroom Presets Folder“. This will open up your Lightroom Presets folder, inside it you will find a folder named “Develop Presets“. This is where you will install your Lightroom Presets, like the ones you purchased or downloaded from the Contrastly Store.
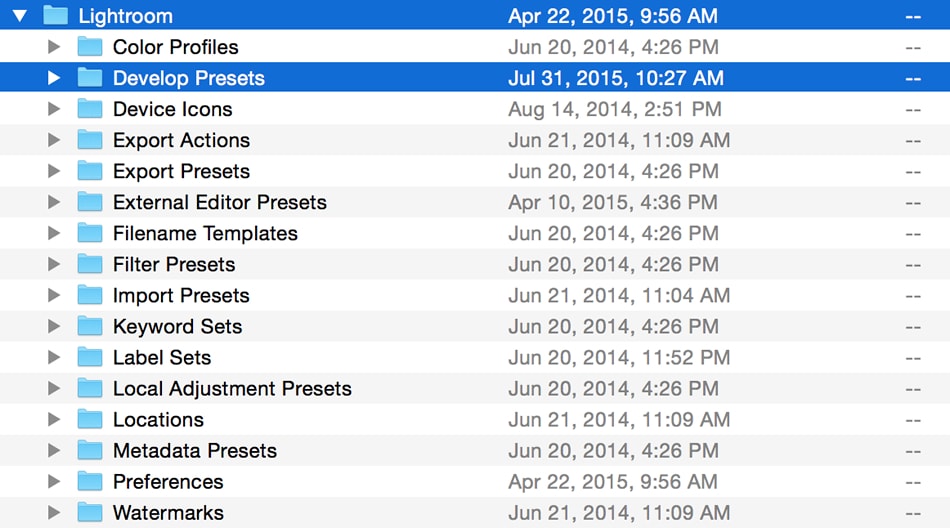 Open this folder. Inside of it you will find a few existing presets as well as any other presets you have installed already.
Now, simply move the presets you have downloaded (the ones from Step 1, they should be on your desktop or in your Downloads folder) into the Develop Presets folder.
Then simply quit Lightroom and re-open it. You will then see all your new Lightroom presets under the Develop module, in the Presets panel on the left.
 Enjoy!


 The key is generally your most intense light and is placed 15–45 degrees to the side of your subject. The main purpose of the key is to wrap the face in the appropriate quality of light based on the subject’s features and the story you want to tell.
 When digital cameras became commercially available, the memory cards used to store pictures were very expensive. Many photographers couldn’t afford multiple or high-capacity cards, so they wanted more images to fit on a single, smaller card. Many users also emailed their pictures to friends and family. Small file sizes enabled consumers who lacked an understanding of digital imaging to attach photos to emails with minimum technical headaches. With these two scenarios in mind, manufacturers turned to an Internet-friendly format, JPEG (Joint Photographic Experts Group). It was a proven technology and one that was familiar to many users.


